On-call Schedule Management (PREMIUM)
Introduced in GitLab Premium 13.11.
Use on-call schedule management to create schedules for responders to rotate on-call responsibilities. Maintain the availability of your software services by putting your teams on-call. With an on-call schedule, your team is notified immediately when things go wrong so they can quickly respond to service outages and disruptions.
To use on-call schedules, users with Maintainer permissions must do the following:
If you have at least Maintainer permissions to create a schedule, you can do this manually.
Schedules
Set up an on-call schedule for your team to add rotations to.
Follow these steps to create a schedule:
- Go to Operations > On-call Schedules and select Add a schedule.
- In the Add schedule form, enter the schedule's name and description, and select a timezone.
- Click Add schedule.
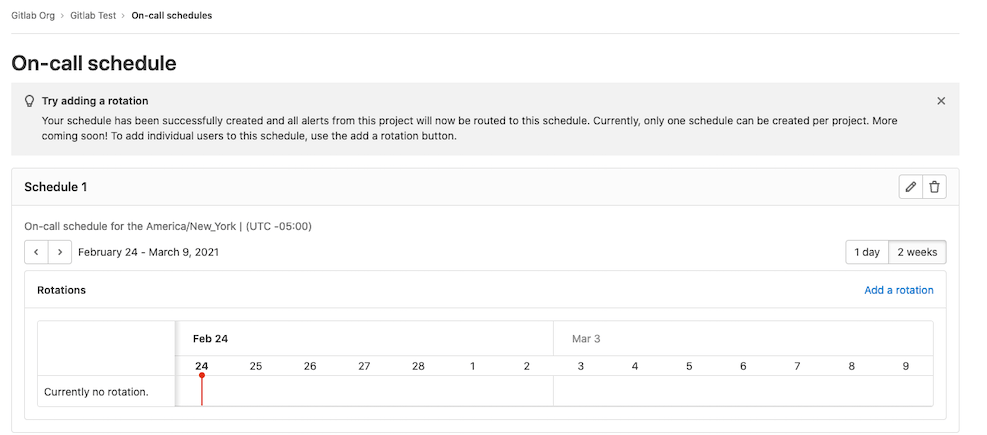
You now have an empty schedule with no rotations. This renders as an empty state, prompting you to create rotations for your schedule.
Edit a schedule
Follow these steps to update a schedule:
- Go to Operations > On-call Schedules and select the Pencil icon on the top right of the schedule card, across from the schedule name.
- In the Edit schedule form, edit the information you wish to update.
- Click the Edit schedule button to save your changes.
If you change the schedule's time zone, GitLab automatically updates the rotation's restricted time interval (if one is set) to the corresponding times in the new time zone.
Delete a schedule
Follow these steps to delete a schedule:
- Go to Operations > On-call Schedules and select the Trash Can icon on the top right of the schedule card.
- In the Delete schedule window, click the Delete schedule button.
Rotations
Add rotations to an existing schedule to put your team members on-call.
Follow these steps to create a rotation:
-
Go to Operations > On-call Schedules and select Add a rotation on the top right of the current schedule.
-
In the Add rotation form, enter the following:
- Name: Your rotation's name.
- Participants: The people you want in the rotation.
- Rotation length: The rotation's duration.
- Starts on: The date and time the rotation begins.
- Enable end date: With the toggle set to on, you can select the date and time your rotation ends.
- Restrict to time intervals: With the toggle set to on, you can restrict your rotation to the time period you select.
Edit a rotation
Follow these steps to edit a rotation:
- Go to Operations > On-call Schedules and select the Pencil icon to the right of the title of the rotation that you want to update.
- In the Edit rotation form, make the changes that you want.
- Select the Edit rotation button.
Delete a rotation
Follow these steps to delete a rotation:
- Go to Operations > On-call Schedules and select the Trash Can icon to the right of the title of the rotation that you want to delete.
- In the Delete rotation window, select the Delete rotation button.
View schedule rotations
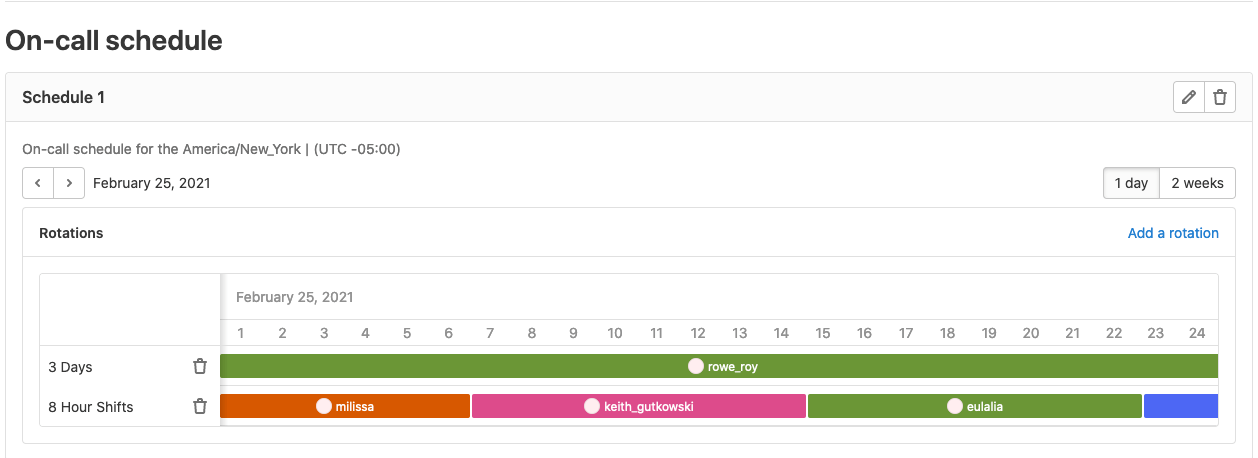
You can view the on-call schedules of a single day or two weeks. To switch between these time periods, select the 1 day or 2 weeks buttons on the schedule. Two weeks is the default view.
Hover over any rotation shift participants in the schedule to view their individual shift details.
Page an on-call responder
When an alert is created in a project, GitLab sends an email to the on-call responder(s) in the on-call schedule for that project. If there is no schedule or no one on-call in that schedule at the time the alert is triggered, no email is sent.
Removal or deletion of on-call user
If an on-call user is removed from the project or group, or their account is deleted, the confirmation modal displays the list of that user's on-call schedules. If the user's removal or deletion is confirmed, GitLab recalculates the on-call rotation and sends an email to the project owners and the rotation's participants.

